Greetings math friends! In today’s post we are going to go over several geometric constructions you’ll need to know in order to pass Geometry! We’ll go over each kind of geometric construction one step at a time with compass and straightedge. Geometry constructions can be a lot of fun and a great part of math you may have never known about! Hope you are ready to get your math and artistic skills flowing, so have your compass and straightedge handy as we tackle the following Geometry Constructions.
Geometric Constructions:
Bisect a Line Segment
Perpendicular Line Through a Point
Angle Bisector
Steps of Construction of 45 degree Angle
Equilateral Triangle
Altitudes of a Triangle (Acute, Obtuse, Right)
Square Inscribed in a Circle
Bisect a Line Segment (Using a Compass & Straightedge):
A Perpendicular Bisector does cuts a line in half at its midpoint, creating two equal halves. This will creates four 90º angles about the line.
How to Bisect a Line Segment Step by Step:
Step 1: First, we are going to measure out a little more than halfway across the line AB by using a compass.
Step 2: Next we are going to place the compass on point A and swing above and below line AB to make a half circle.
Step 3: Keeping the same distance on our compass, we are then going to place the point of the compass onto Point B and repeat the same step we did on point A, drawing a semi circle.
Step 4: Notice the intersections above and below line AB!? Now, we want to connect these two points by drawing a line with a ruler or straightedge.
Step 5: Yay! We now have a perpendicular bisector! This cuts line AB right at its midpoint, dividing line AB into two equal halves. It also creates four 90º angles.
Check out the full video with explanation below and original post here.
Perpendicular Line Through a Point Construction:
A Perpendicular Line Through a Point is very similar to a perpendicular bisector, but this time instead of “slicing” a line segment right down the middle, we are creating a perpendicular line through any point on our line segment. A perpendicular line in this case will also create four 90º angles. Take a look at how it works below:
Step 1: First, we are going to gather materials, for this construction we will need a compass, straightedge, and markers.
Step 2: Notice that we need to make a perpendicular line going through point B that is given on our line.
Step 3: Open up our compass to any distance (something preferably short though to fit around our point and on the line).
Step 4: Place the compass end-point on Point B, and draw a semi-circle around our point, making sure to intersect the given line.
Step 5: Open up the compass (any size) and take the point of the compass to the intersection of our semi-circle and given line. Then swing our compass above the line.
Step 6: Keeping that same length of the compass, go to the other side of our point, where the given line and semi-circle connect. Swing the compass above the line so it intersects with the arc we made in the previous step.
Step 7: Mark the point of intersection created by these two intersecting arcs we just made and draw a perpendicular line going through Point B!
Check out the full video with explanation below and original post here.
Angle Bisector Construction:
An Angle Bisector is a line that evenly cuts an angle into two equal halves, creating two equal angles. Angle Bisectors are great because they cut any and every angle in half every time! Take a look at the construction process below:
Step 1: Place the point of your compass on the point of the angle.
Step 2: Draw an arc that intersects both lines that stem form the angle you want to bisect.
Step 3: Take the point of your compass to where the lines and arc intersect, then draw an arc towards the center of the angle.
Step 4: Now keeping the same distance on your compass, take the point of your compass and place it on the other point where both the line and arc intersect, and draw another arc towards the center of the angle.
Step 5: Notice we made an intersection!? Where these two arcs intersect, mark a point and using a straightedge, connect it to the center of the original angle.
Step 6: We have officially bisected our angle into two equal 35º halves.
Check out the full video with explanation below and original post here.
Steps of Construction of 45 Degree Angle:
Time to construct a 45º angle! The key to getting this construction right is knowing that 45º is half of 90º. Let take a look at how this construction is done with compass and straightedge step by step below!
Step 1: Using a straightedge, draw a straight line, labeling each point A and B.
Step 2: Using a compass, place the point of the compass on the edge of point A and draw a circle.
Step 3: Keeping the same length of the compass, take the point of the compass to the point where the circle and line AB intersect. Then swing compass and make a new arc on the circle.
Step 4: Keeping that same length of the compass, go to the new intersection we just made and mark another arc along the circle.
Step 5: Now, take a new length of the compass (any will do), and bring it to one of the intersections we made on the circle. Then create a new arc above the circle by swinging the compass.
Step 6: Keep the same length of the compass and bring it to the other intersection we made on our circle. Then create a new arc above the circle.
Step 7: Mark a point where these two lines intersect and using a straightedge, connect this intersection to point A. Notice this forms a 90º angle.
Step 8: Now to bisect our newly made 90º angle, we are going to focus on the pink hi-lighted points where the original circle intersects with line AB and our newly made line.
Step 9: Using a compass (any length), take the compass point to one of these hi-lighted points and make an arc.
Step 10: Keeping that same length of the compass, go to the other hi-lighted point and make another arc.
Step 11: Now with a straightedge, draw a line from point A to the new intersection of arcs we just made.
Step 12: Notice we split or 90º angle in half and now have two equal 45º angles?!
Check out the full video with explanation below and original post here.
Equilateral Triangle Construction:
Equilateral Triangle: A triangle with three equal sides. Not an easy one to forget, the equilateral triangle is super easy to construct given the right tools (compass+ ruler). Take a look below:
1. Using a compass, measure out the distance of line segment ![]() .
.
2. With the compass on point A, draw an arc that has the same distance as ![]() .
.
3. With the compass on point B, draw an arc that has the same distance as ![]() .
.
4. Notice where the arcs intersect? Using a ruler, connect points A and B to the new point of intersection. This will create two new equal sides of our triangle!
Check out the full video with explanation below and original post here.
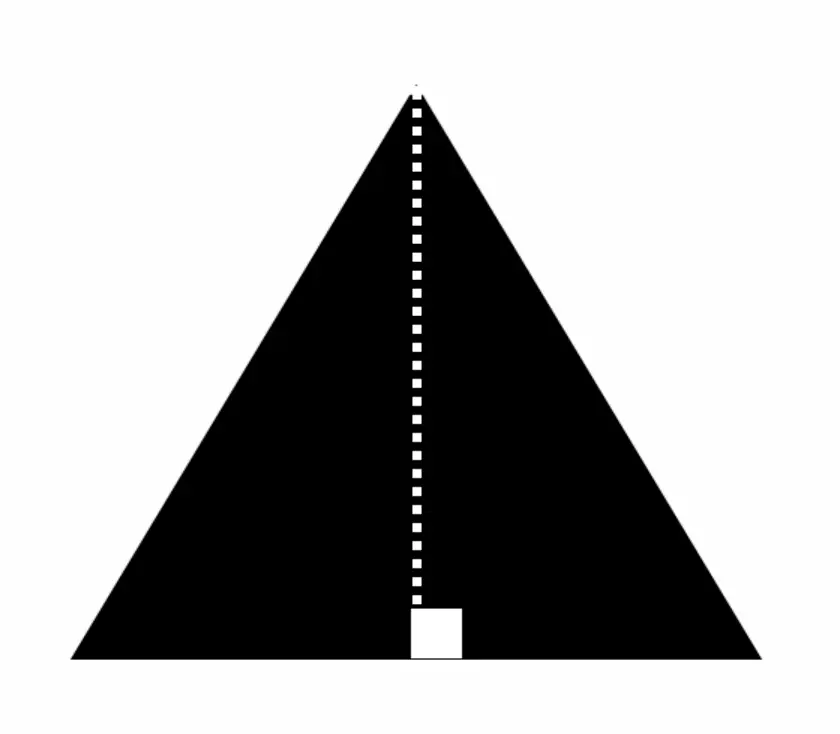
Constructing Altitudes of a Triangle (Acute, Obtuse, Right):
An Altitude is a perpendicular line drawn from the vertex of a triangle to the opposite side, creating a 90º angle.
Check out how to find the Altitudes of an acute, obtuse and right triangle in the video below and post here.
In the video above, we will look at how to find the altitude of an acute obtuse, and right triangle. We will also find something called the orthocenter which is explained below.
How to Find the Orthocenter of Triangle with a Compass:
The Orthocenter is a point where all three altitudes meet within a triangle.
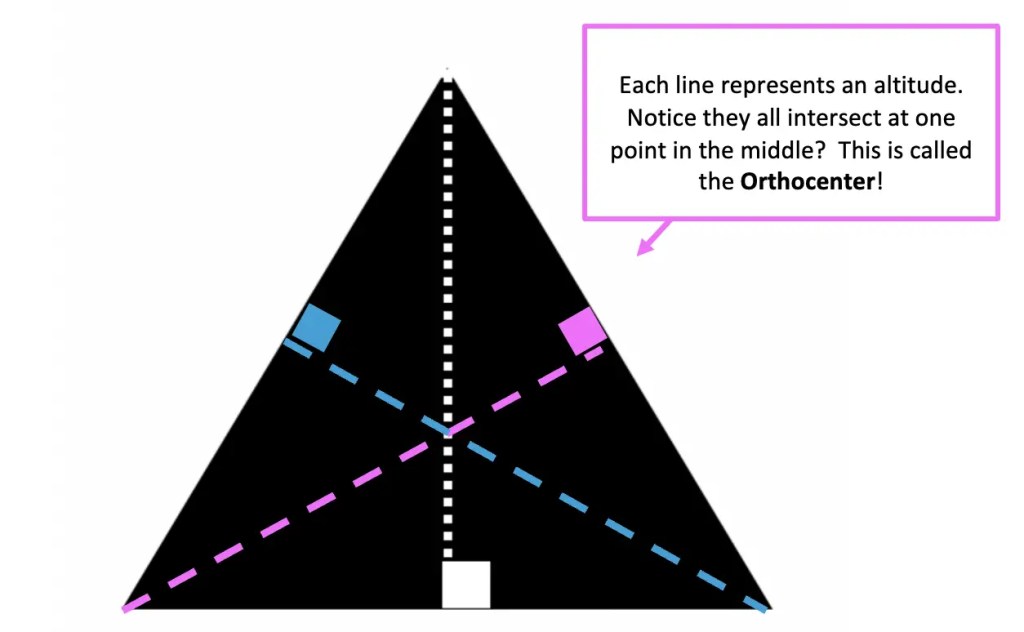
In order to find the orthocenter using a compass, all we need to do is find the altitude of each vertex. The point at which they meet is the orthocenter. Check out the video above to see how this works step by step.
Square Inscribed in a Circle Construction:
Step 1: Draw a circle using a compass.
Step 2: Using a ruler, draw a diameter across the length of the circle, going through its midpoint.
Step 3: Open up the compass across the circle. Then take the point of the compass to one end of the diameter and swing the compass above the circle, making a mark.
Step 4: Keeping that same length of the compass, go to the other side of the diameter and swing above the circle again making another mark until the two arcs intersect.
Step 5: Repeat steps 3 and 4, this time creating marks below the circle.
Step 6: Connect the point of intersection above and below the circle using a ruler. This creates a perpendicular bisector, cutting the diameter in half and forming 90º angles.
Step 7: Lastly, use a ruler to connect each corner point to one another creating a square.
Check out the full video with explanation below and original post here.
Best Geometry Tools!
Looking to get the best construction tools? Any compass and straight-edge will do the trick, but personally, I prefer to use my favorite mini math toolbox from Staedler. Stadler has a geometry math set that comes with a mini ruler, compass, protractor, and eraser in a nice travel-sized pack that is perfect for students on the go and for keeping everything organized….did I mention it’s only $7.99 on Amazon?! This is the same set I use for every construction video in this post. Check out the link below and let me know what you think!

Still got questions? Looking for more constructions that you don’t see here? No problem! Don’t hesitate to comment with any questions and comments below. Happy calculating! 🙂
Facebook ~ Twitter ~ TikTok ~ Youtube
8 thoughts on “Geometry Constructions”