Happy Wednesday math friends! In today’s post, we are going to go over what the phrase, “finding the sum of a finite geometric series” means and then use the finite geometric series formula to solve an example one step at a time! A finite geometric series happens when we add together a finite amount of terms from a geometric sequence together. We will go into more detail below and as always if you have any questions be sure to check out the video and comment with any questions below.
*If you need a refresher on geometric sequences (otherwise known as a geometric progression) before tackling these types of questions, don’t hesitate to check out this post! And, if you’re looking for an infinite geometric series, as opposed to a finite one, also be sure to check that out.
What does it mean to find the “Sum of the Finite Geometric Sequence”?
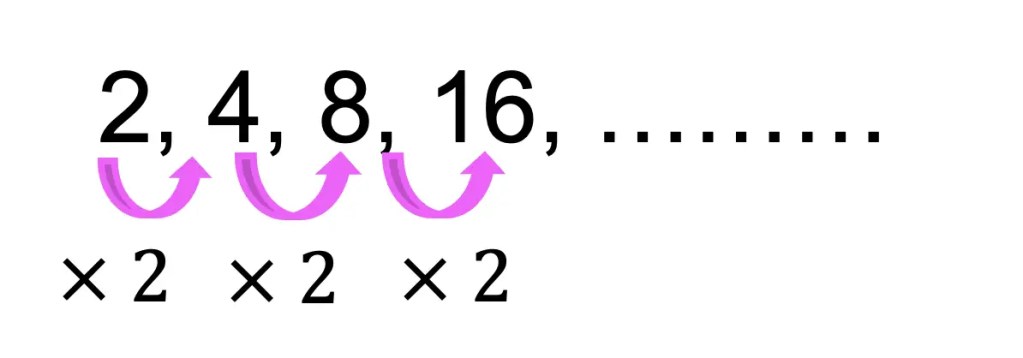
We already know what a geometric sequence is: a sequence of numbers that form a pattern when the same number is multiplied or divided to each subsequent term. In the example below, we can see that each number in the sequence is being multiplied by the common ratio, the number 2.
Geometric Sequence Example:
But what happens if we wanted to sum the first 20 terms of our geometric sequence together? Adding 2+4+8+16+……a20 . Notice I used the notation a20 to represent our unknown 20th term of the finite sequence.
Example:

How would we calculate that? Instead of finding the first 20 terms of our sequence and adding them all together, thankfully there is a better way, which is where our Finite Geometric Series formula comes in handy!
Why is it called “finite”? Adding the first 20 terms of our geometric sequence are considered to be “finite” because the first 20 terms have a definite ending as opposed to a sequence that is infinite and goes on forever. Adding together an infinite geometric series comes with a different formula.
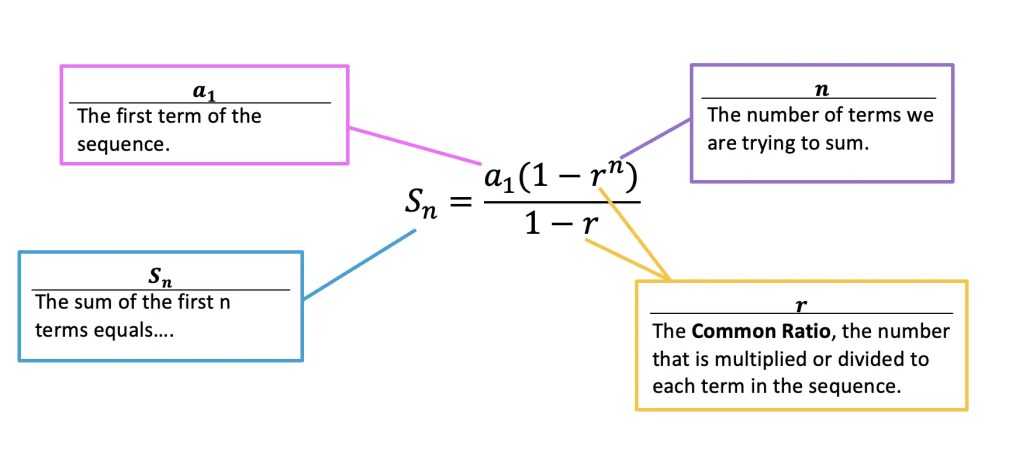
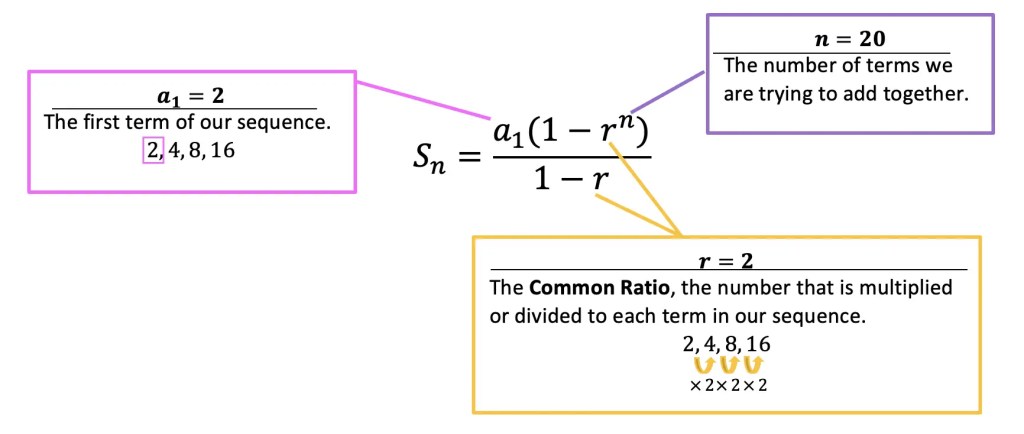
Finite Geometric Series Formula:
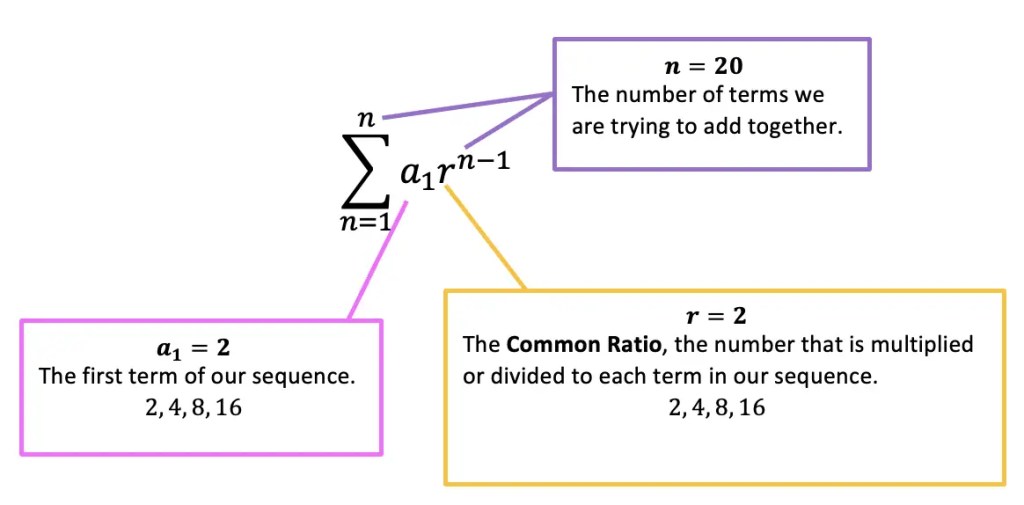
a1=The first term of our sequence. In this case, we can see that the first term will be the number 2 in the example above. Therefore, we can say a1=2.
r= The common ratio is the number that is multiplied or divided by each consecutive term within the sequence. In the example above, each number is multiplied by 2, therefore we can say, r=2.
n= The total number of terms we are trying to sum together. In the example mentioned above, we are trying to sum 20 terms in total, so in this case n=20.
Now that we have this finite geometric series equation to work with, let’s take another look at our question and apply our finite geometric series formula to answer the solution:
Finite Geometric Series Example:

Step 1: First let’s write out the finite geometric series formula and identify what each part represents/what numbers need to be filled in.
a1=2 The first term of our sequence. a1=2.
r= 2 The common ratio is the number that is multiplied or divided by each consecutive term within the sequence.
n= 20 The total number of terms we are trying to sum together.
Step 2: Now let’s plug in our numbers into the finite geometric series formula and calculate and solve with the given values.
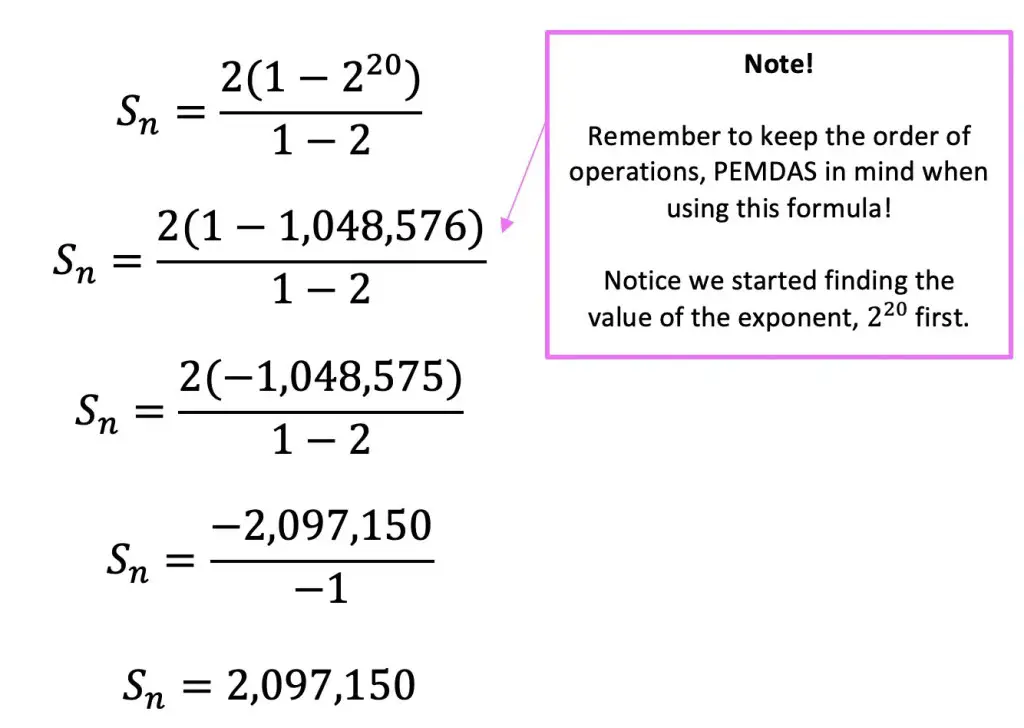

We have found our solution! Remember the number here, 2,097,150 represents the sum of the first 20 numbers of the geometric sequence given to us 2+4+8+16+……a20=2,097,150.
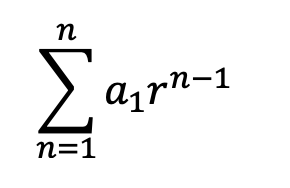
Summation Notation – Finite Geometric Sequence
You may come across the finite geometric series formula in a different format, known as summation notation or sigma notation. Writing in summation notation, we are actually writing the sum of the geometric sequence in a different way, but will still come to the same solution as we did using the formula. Check it out below:
Now that we know what each part of this summation notation looks like, let’s actually identify what each part of this equation means:
Now let us go back and try to solve our original question, finding the sum of the first 20 terms of the sequence 1, 4,8, 16, …. all the way to thew 20th term:
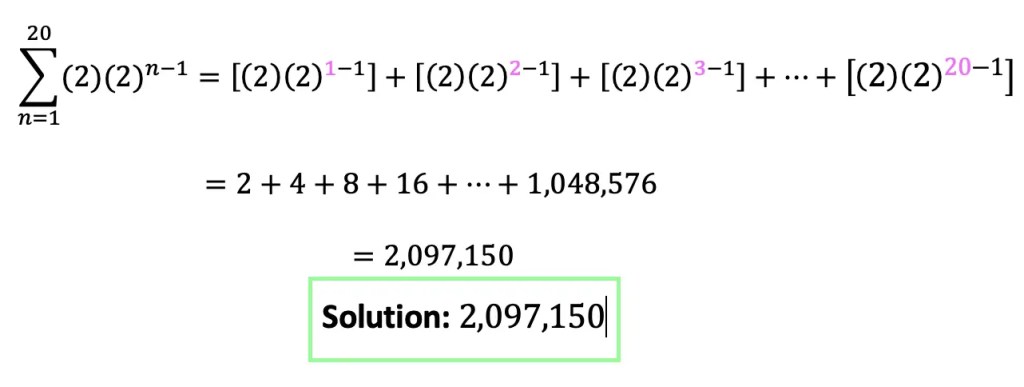
Notice we get the same exact solution as we did in the previous example, mission accomplished!
Note! Does the above summation notation totally freak you out? Fear not! Learn more about how summation notation works here,what it means, and don’t be intimidated by these math symbols anymore!
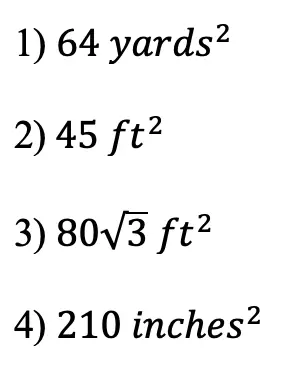
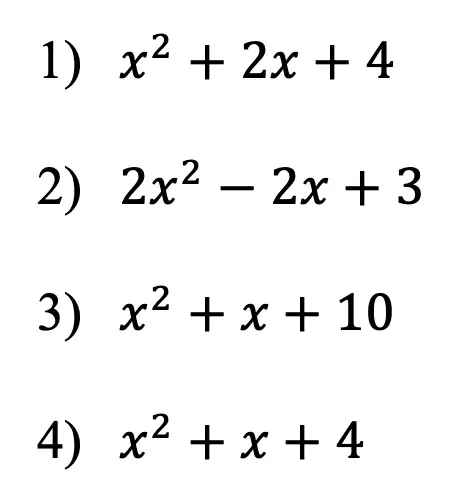
Think you are ready to try questions on your own? Check out similar practice questions and find the sum of each finite series below!
Practice Questions:
1) Find the sum of the first 15 terms of the following geometric sequence:
4, 12, 36, 108, ….
2) Find the finite sum of the first 12 terms of the following sequence and round to the nearest tenth:
128, 64, 32, 16, ….
3) Find the sum of the first 18 successive term of the following geometric sequence and round to the nearest tenth:
400, 100, 25, 6.25, ….
4) Find the sum of the first 12 consecutive terms of the following geometric sequence:
3, 6, 12, 24, ….
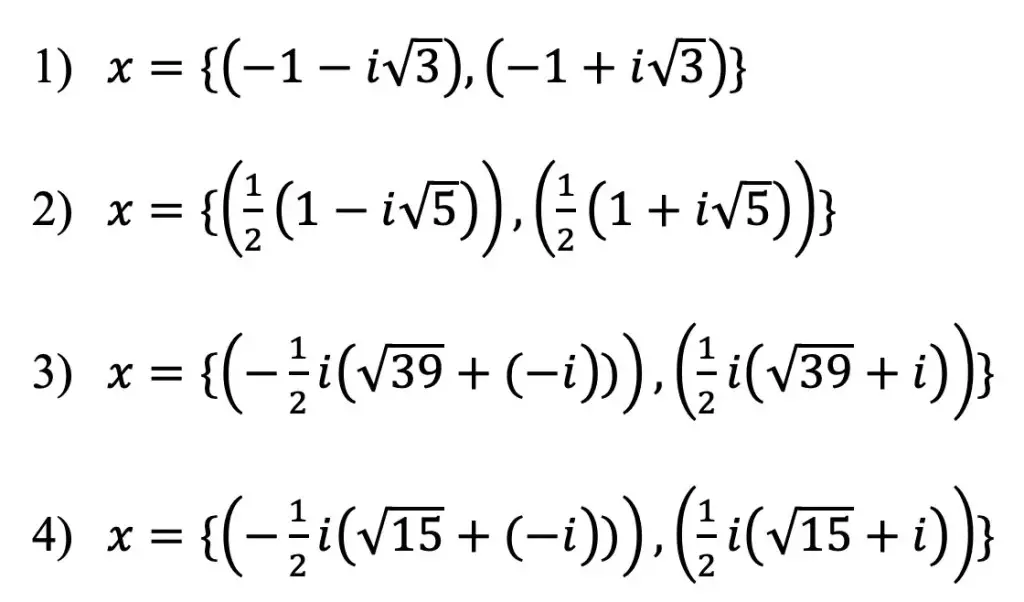
Solutions:
1) 28,697,812
2) 255.9
3) 533.3
4) 12,285
Related Posts:
Looking to learn more about sequences? You’ve come to the right place! Check out these sequence resources and posts below. Personally, I recommend looking at the finite geometric sequence or the geometric infinite series posts next!
Golden Ratio in the Real World
Still, got questions? No problem! Don’t hesitate to comment with any questions below or check out the video above. Thanks so much for stopping by and happy calculating! 🙂
Facebook ~ Twitter ~ TikTok ~ Youtube